If you have hooded eyes and cluster lashes haven't been working the way you hoped — too heavy, too closed-off, or just not as open as you wanted — placement is almost always the reason. Hooded eyes have a fold of skin that sits lower over the crease, which means the outer corner of your lash line is partially covered when your eyes are open. That changes everything about how cluster lengths read on your face. This guide walks you through a beginner-friendly lash map designed with hooded eyes in mind, along with the placement adjustments that make the most difference.
What hooded eyes mean for lash placement

Hooded eyes have a skin fold that partially covers the eyelid crease when the eyes are open. The amount of visible lid space varies from person to person — some people have a subtle hood, others have very little visible lid at all. This matters for cluster lashes because the outer corner of your lash line sits under or very close to that fold. When you apply a long cluster at the outer corner, the hood can push it downward, making the eye look heavier and more closed rather than lifted. This is why the standard "longer at the outer corner" rule that works for almond or round eyes often backfires on hooded eyes.
Pro tip: Look straight into a mirror with a relaxed expression — not wide-eyed. That's the view everyone else sees, and it's the view you should use to assess your lash placement.
A balanced beginner map for hooded eyes

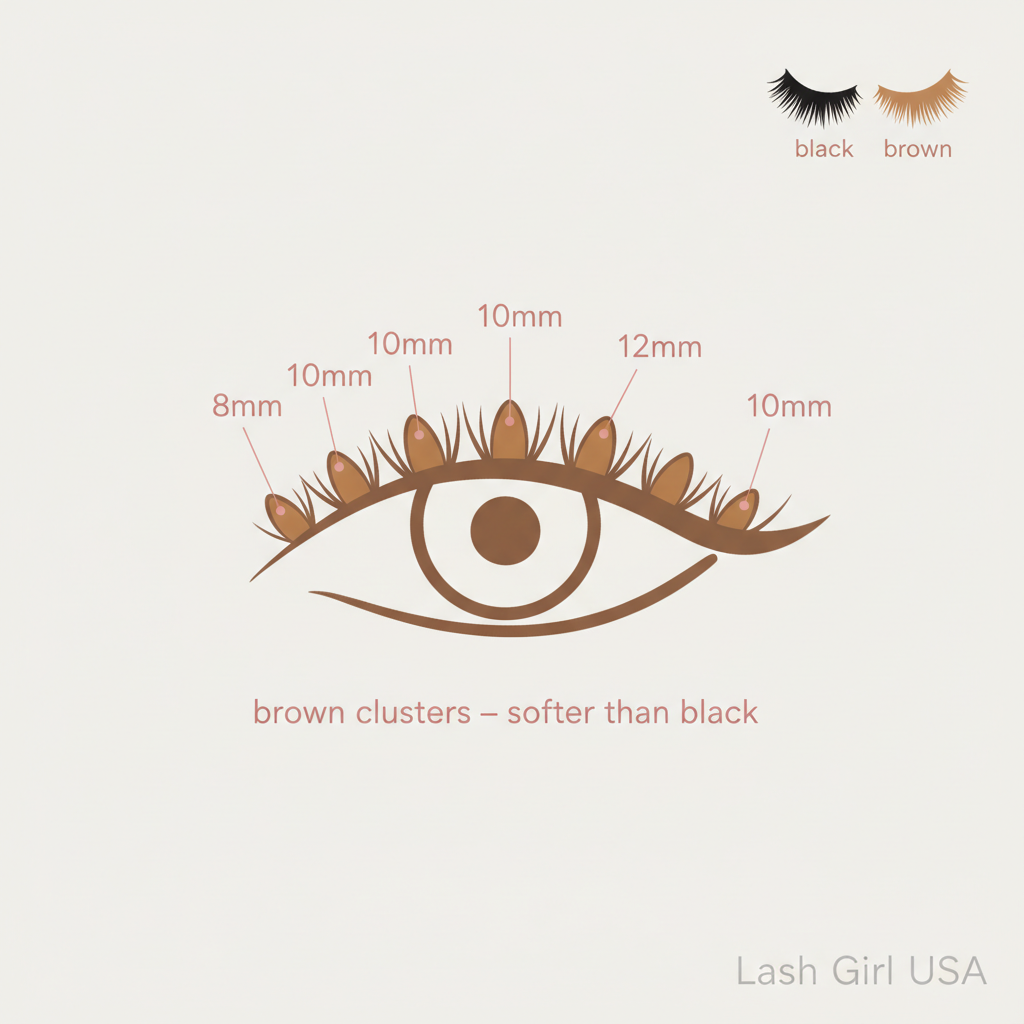
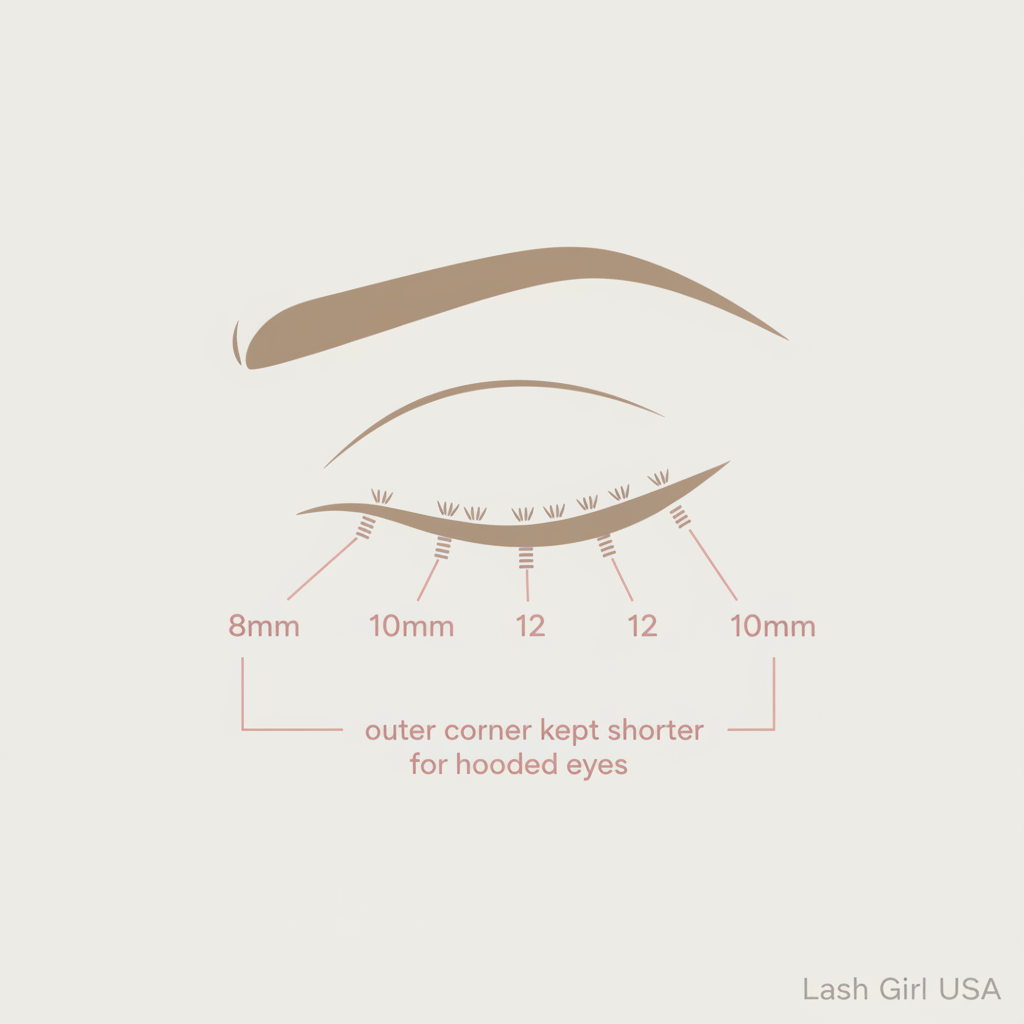
Here is a starting-point map that works well for many hooded eye shapes. Read from inner corner to outer corner: 8mm → 10mm → 12mm → 12mm → 10mm. The key difference from a standard natural map is that the outer corner steps back down to 10mm instead of staying at 12mm or going longer. This prevents the outer cluster from being pushed down by the hood, which would visually close the eye. The 12mm clusters in the center create the most lift where the lid is most visible. As always, this is a starting point — your specific eye shape, natural lash length, and the product you're using will all affect how these lengths look on you.
Pro tip: Apply your clusters, then look straight ahead with a relaxed expression before deciding if you need to adjust. The look changes significantly between looking down into a mirror and looking straight ahead.
Natural option: a softer, everyday map

For a barely-there natural look, try: 8mm → 8mm → 10mm → 10mm → 8mm. This keeps everything short and soft, with the slight length increase in the center adding just enough definition to look intentional without any drama. This map works well for first-time wearers with hooded eyes who want to get comfortable with the application process before experimenting with longer lengths. It's also a good everyday option when you want enhanced lashes that don't read as "done" from across the room.
Pro tip: Natural maps are also more forgiving of small placement errors. If you're still building your technique, starting shorter gives you more room to adjust.
Slightly lifted option: adding more definition
For more definition and a subtle lift, try: 8mm → 10mm → 12mm → 10mm → 8mm. This map peaks at the center and tapers back down toward both corners. The effect is a rounder, more open-eye look rather than a cat-eye. For hooded eyes, this center-heavy approach often creates more visible impact than trying to extend length toward the outer corner. If you want a cat-eye effect with hooded eyes, the lift needs to come from placement angle rather than length — place the outer cluster at a slightly upward angle rather than straight out.
Pro tip: To create a lifted outer corner without going longer, try placing your outermost cluster at a 10–15 degree upward angle. The angle does more work than the length.
Placement tips specific to hooded eyes

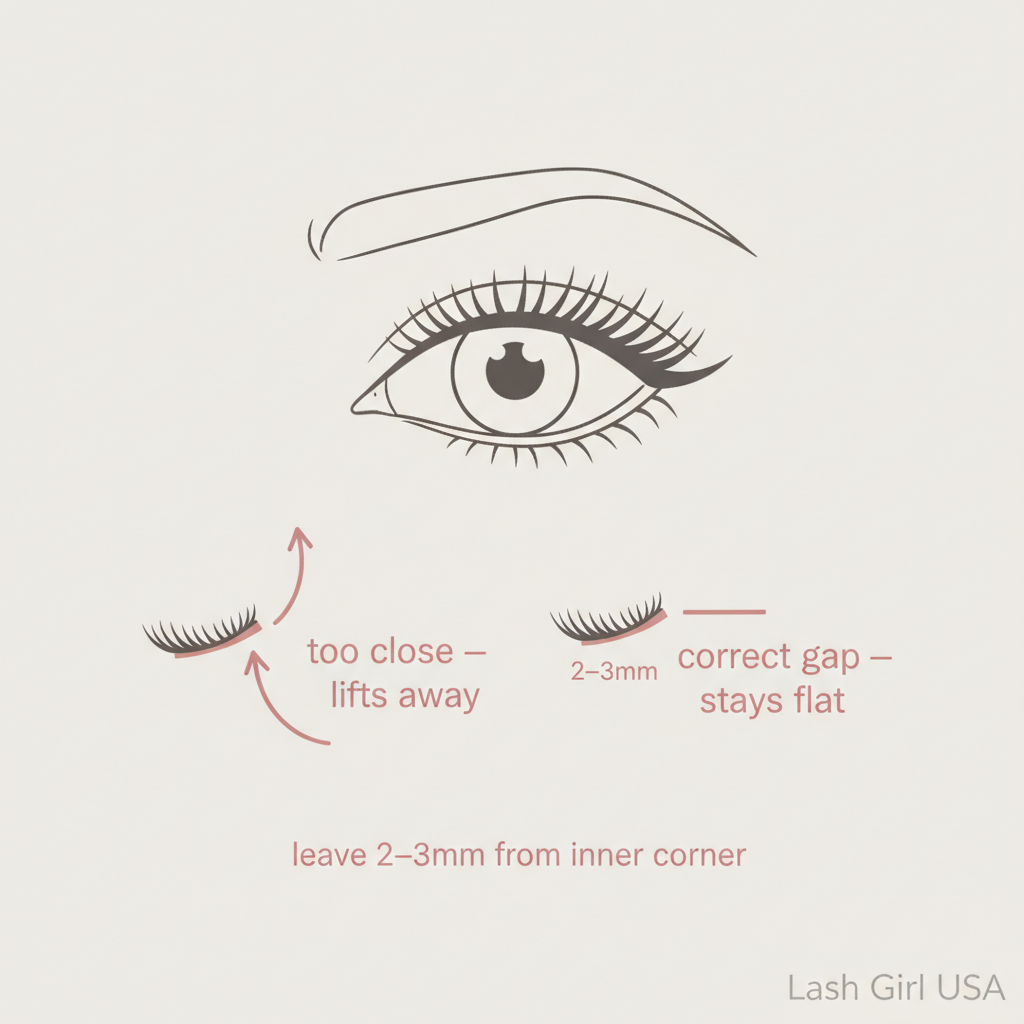
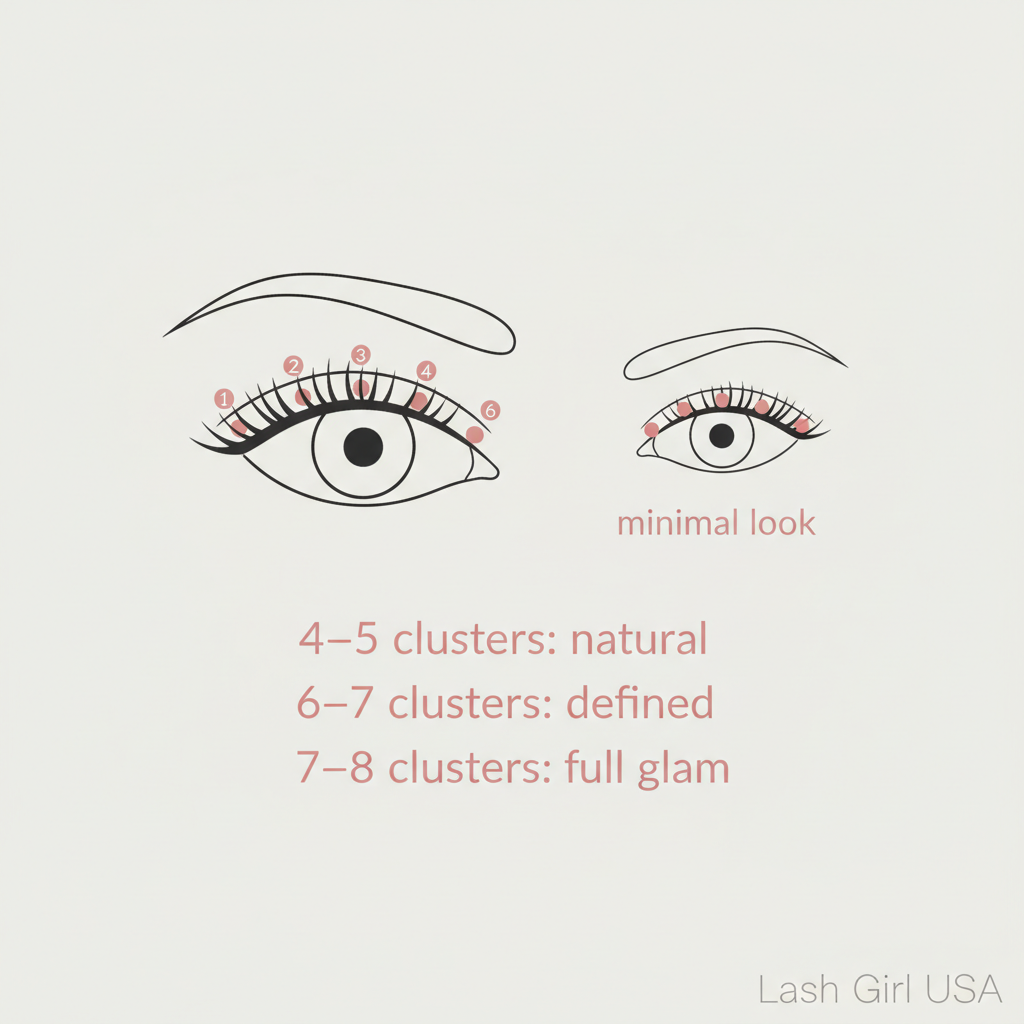
Place clusters closer to the lash root: With hooded eyes, clusters that sit even slightly away from the root can disappear under the fold when your eyes are open. Press each cluster as close to your natural lash base as possible. Avoid the very inner corner: Leave at least 2–3mm from the inner corner regardless of eye shape. For hooded eyes this is especially important — a cluster right at the inner corner can make the eye look smaller. Check placement with eyes open: Apply each cluster, then open your eyes fully and look straight ahead before placing the next one. This lets you see the real effect as you go rather than discovering problems at the end. Consider your lash line angle: Some hooded eyes have a lash line that angles slightly downward at the outer corner. If yours does, placing clusters straight out will follow that downward angle. Try placing the outer clusters at a slight upward angle to counteract it.
Pro tip: A magnifying mirror is useful for placement, but always check the final result in a regular mirror from a normal viewing distance.
Mistakes to avoid
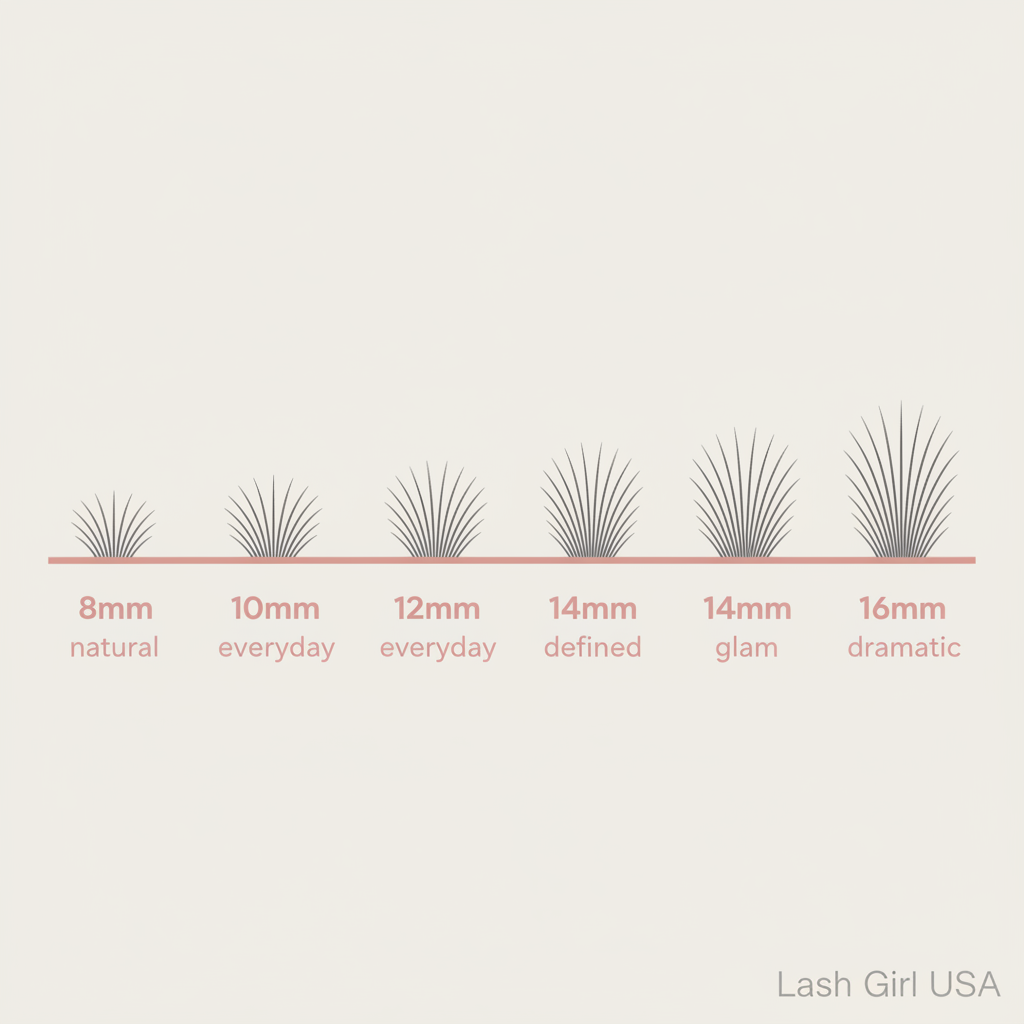
Using long outer corner clusters: This is the most common mistake for hooded eyes. Lengths of 14mm or 16mm at the outer corner will almost always be pushed down by the hood, creating a droopy rather than lifted effect. Applying too many clusters: More clusters means more weight on the lash line. For hooded eyes, 5–6 clusters per eye is usually enough. Adding more can make the eye look heavier. Skipping the open-eye check: Applying all clusters before checking how they look with eyes open means you may need to remove and reapply several. Check as you go. Choosing very curly clusters: A dramatic curl can look beautiful on other eye shapes but may disappear under a hood. A natural or soft curl often shows more on hooded eyes.
Pro tip: If you've tried clusters before and found they made your eyes look smaller or heavier, the issue was almost certainly length or placement — not the clusters themselves.
Frequently asked questions
Can people with hooded eyes wear cluster lashes?
Yes — hooded eyes can absolutely wear cluster lashes. The key is choosing appropriate lengths and placement. Shorter to medium lengths (8–12mm) with a center-heavy map tend to work better than long outer-corner clusters for most hooded eye shapes.
Why do my outer corner clusters always look droopy?
This is almost always a length issue. Long clusters at the outer corner get pushed down by the skin fold, creating a droopy effect. Try stepping back to 10mm or even 8mm at the outer corner and see if that changes the result.
Will cluster lashes make hooded eyes look more open?
They can, with the right map. A center-heavy placement that peaks at 12mm in the middle and tapers back toward the corners tends to create the most open-eye effect for hooded eyes. Very long outer clusters usually have the opposite effect.
How is this map different from the natural beginner map?
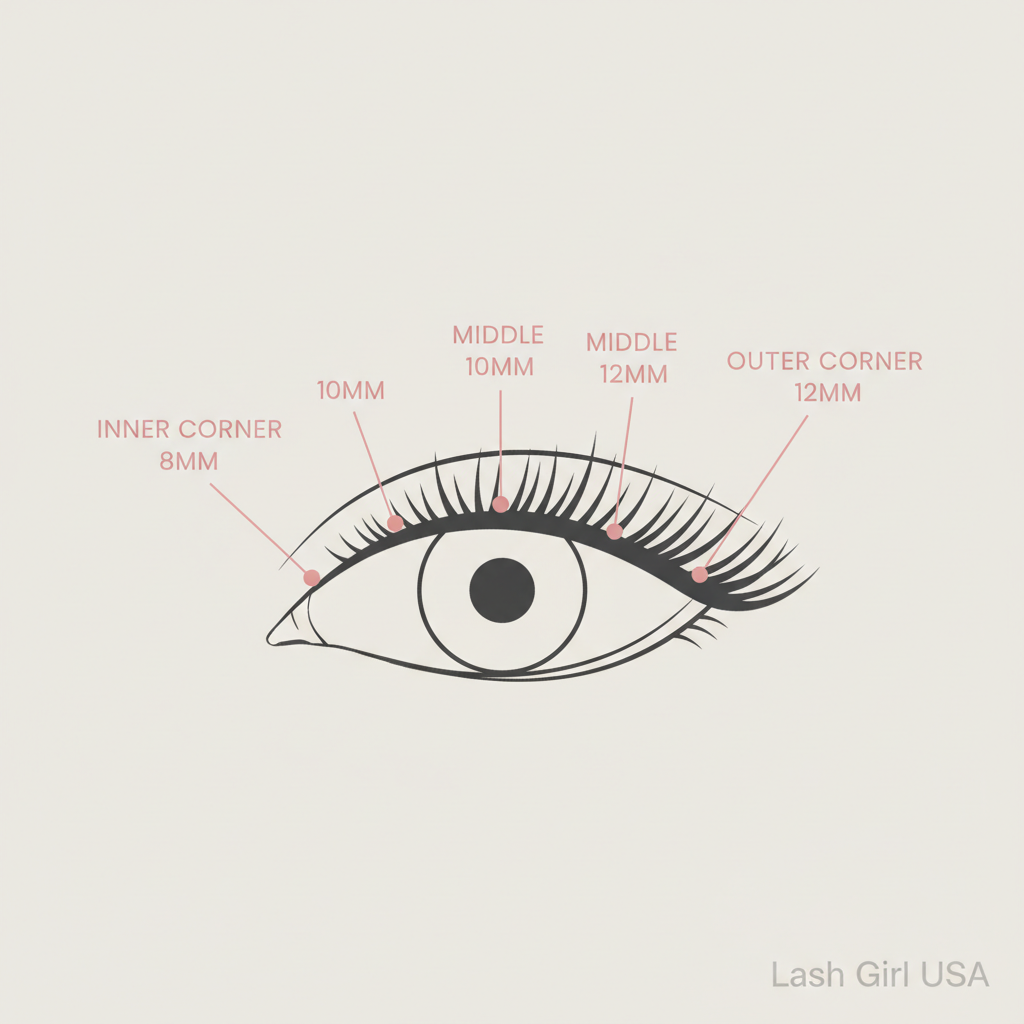
The main difference is the outer corner. A standard natural map goes 8→10→10→12→12, with the longest clusters at the outer corner. The hooded eye map goes 8→10→12→12→10, stepping back down at the outer corner to prevent the hood from pushing the cluster downward.
Safety note: Eye-area products can cause irritation or allergic reactions in some people. Follow the manufacturer's directions, avoid applying adhesive directly to the eye or waterline, discontinue use if irritation occurs, and seek appropriate medical care for persistent or severe symptoms.
Lash Girl USA creates beginner-focused guides about DIY lash clusters, application techniques, tools, styles, retention, and product selection.