
One of the things we love most about lash clusters is how versatile they are. The same technique can give you a soft, barely-there flutter for a Sunday brunch or a full, dramatic look for a night out. The difference comes down to a few key choices: cluster length, volume, placement, and layering. Here's how to think through each one.
Decide on your length

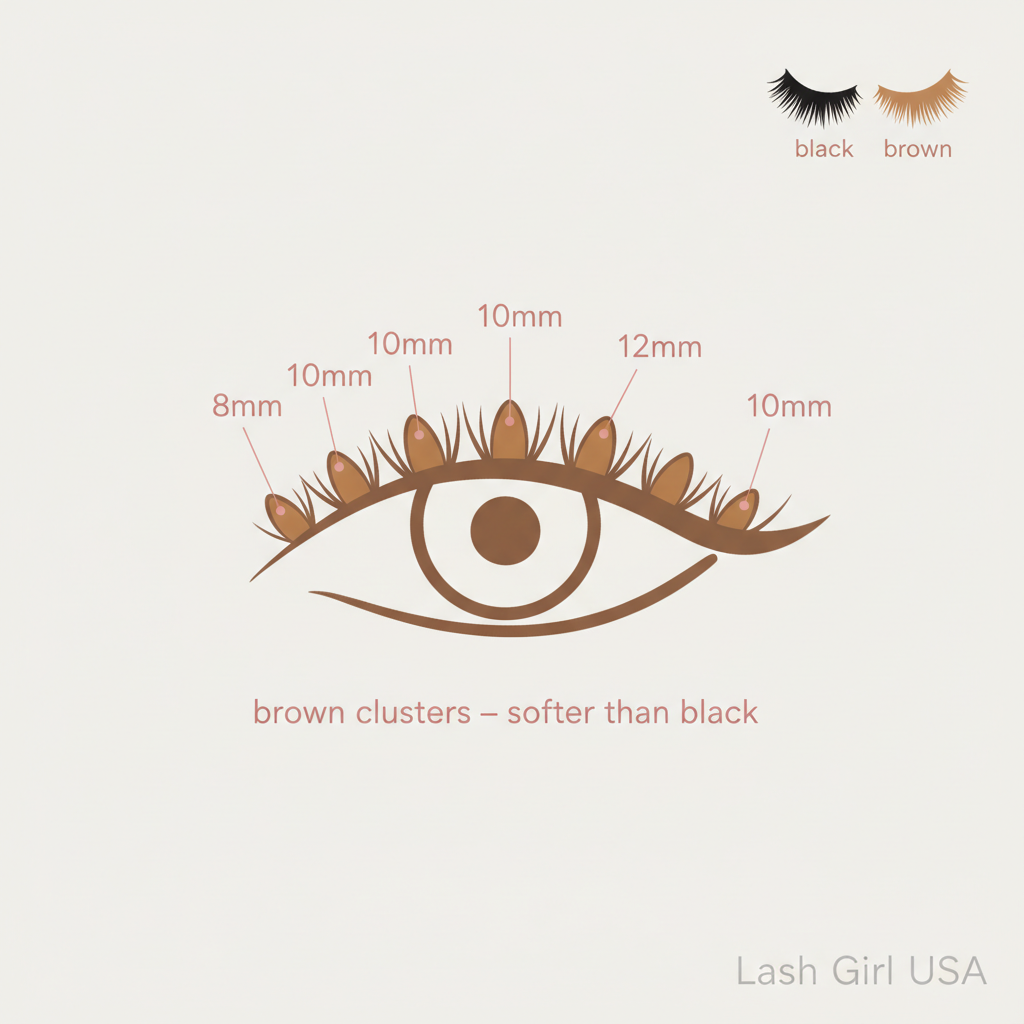
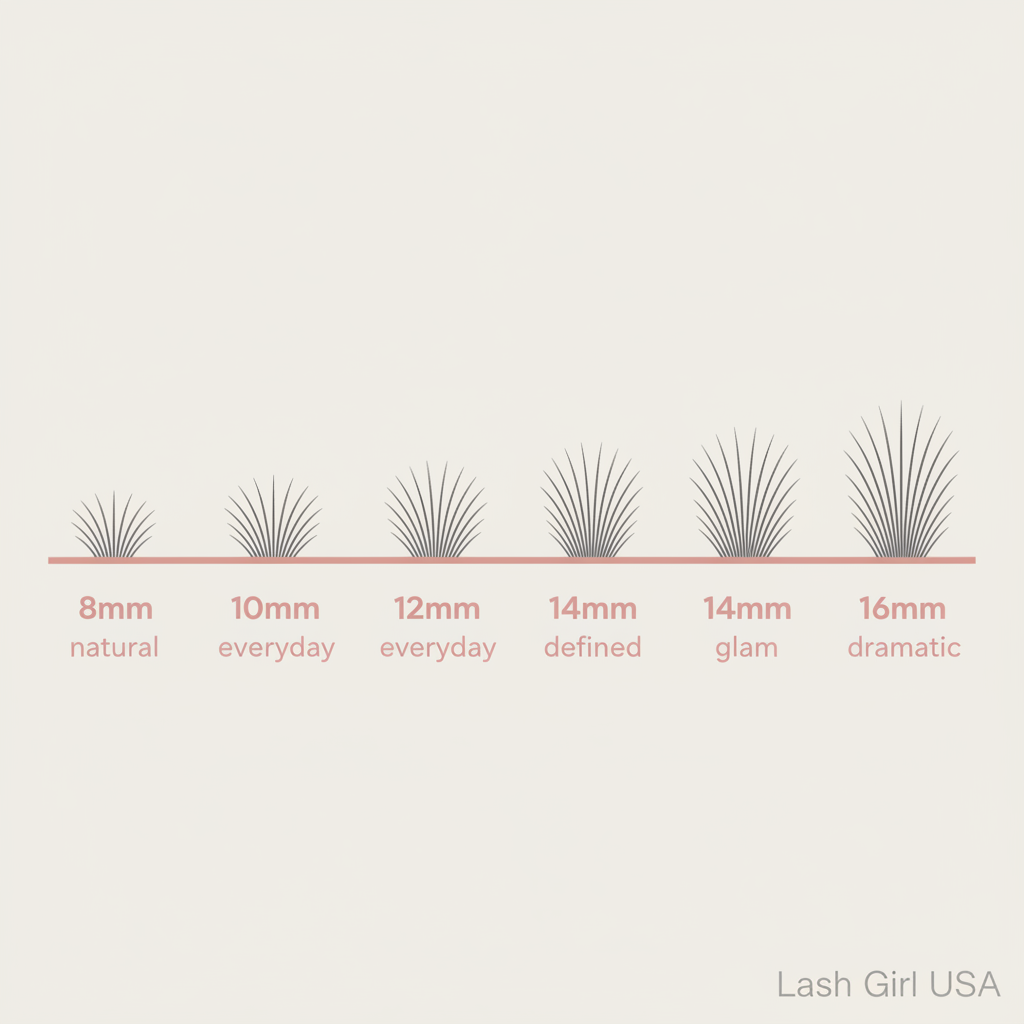
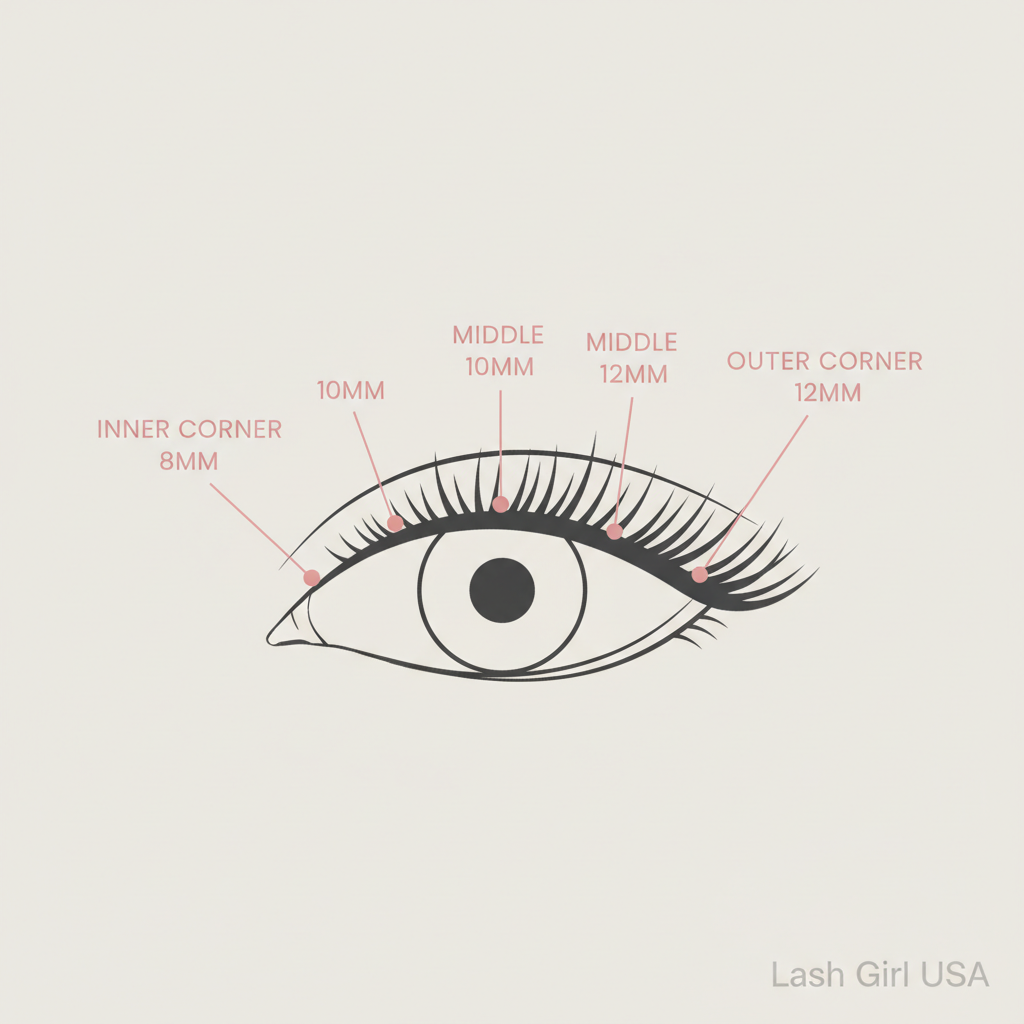
For a natural look, stay within 2–3mm of your natural lash length. Going longer than that starts to read as obviously false, which is fine for glam but not for everyday wear. For a glam look, don't be afraid to go dramatic — longer clusters at the outer corner create a lifted, cat-eye effect that photographs beautifully.
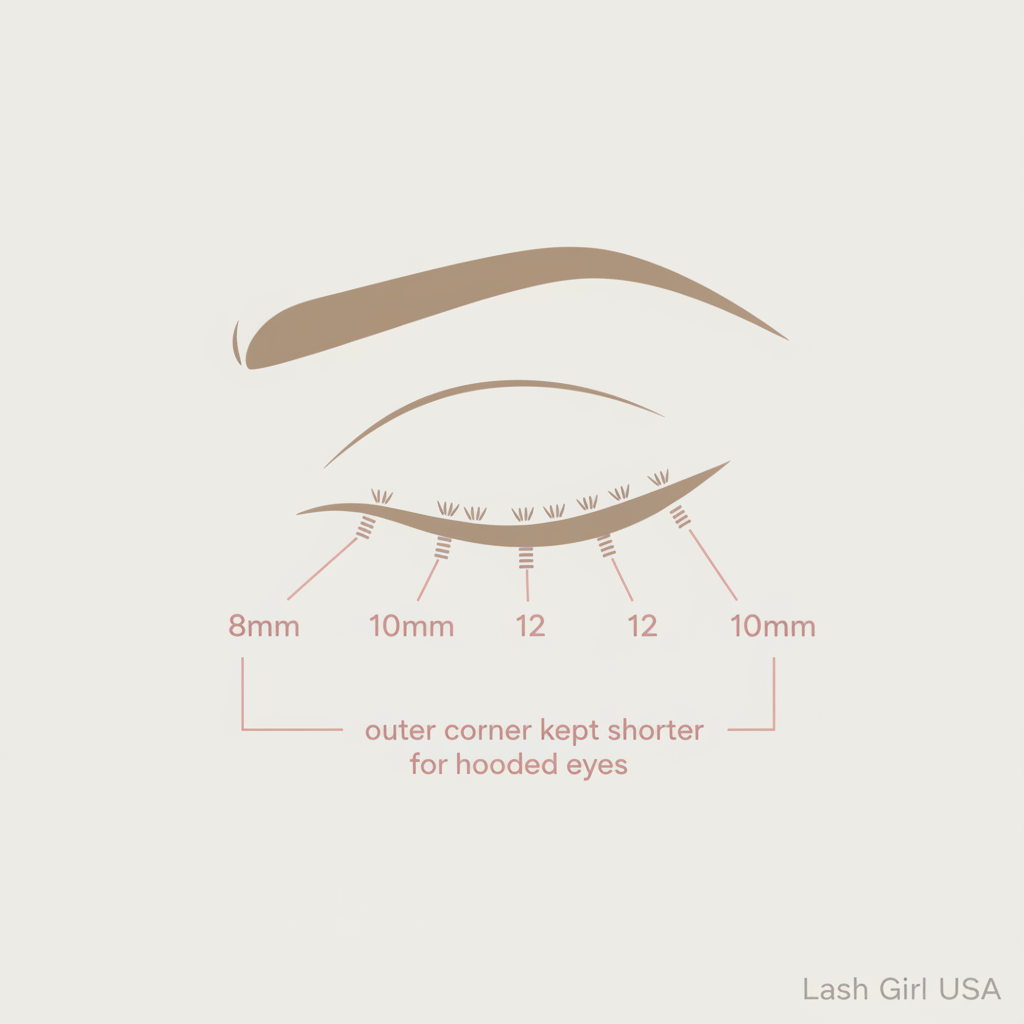
Pro tip: Mix lengths within a single look. Using shorter clusters at the inner corner and longer ones at the outer corner flatters almost every eye shape.
Choose your volume

Clusters come in different densities — wispy, natural, and full. Wispy clusters have a feathered, separated look that mimics natural lashes closely. Full clusters are denser and give more coverage. For a natural look, stick to wispy or natural-density clusters. For glam, layer a wispy cluster over a full one at the outer corner for serious drama.
Pro tip: Layering two clusters on top of each other at the outer corner is the fastest way to build a glam look without buying a different product.
Map your placement

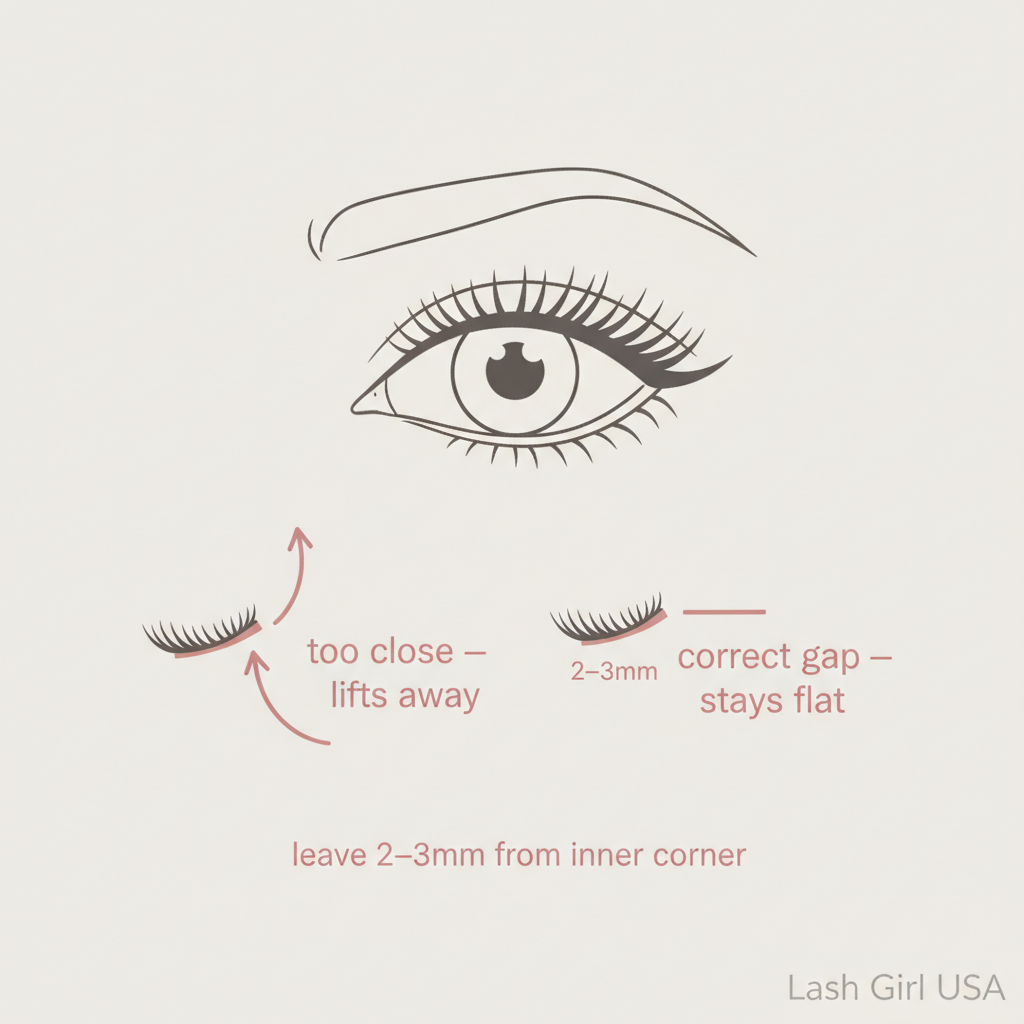
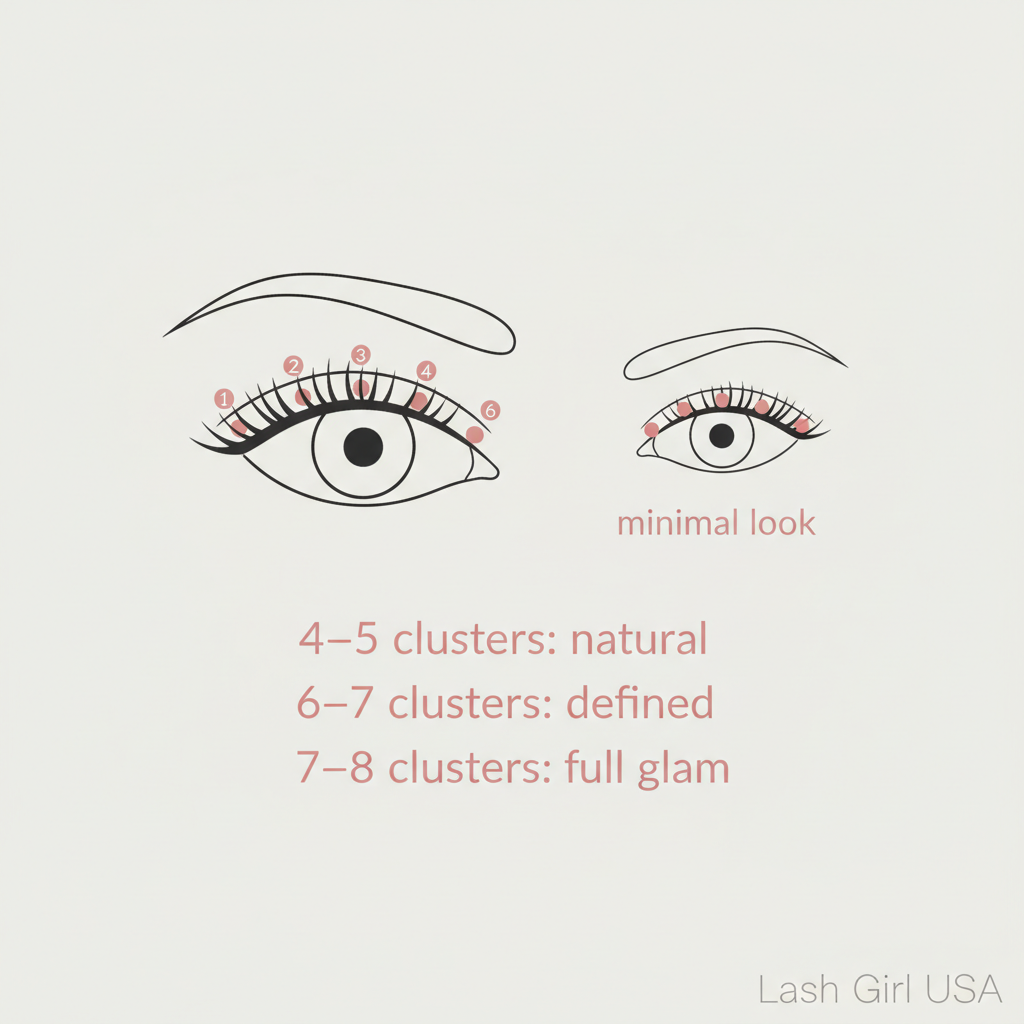
Natural looks use fewer clusters placed evenly across the lash line, leaving small gaps that let your natural lashes show through. Glam looks fill the entire lash line with no gaps, sometimes doubling up at the outer corner. Before you apply any glue, lay your clusters along your lash line dry to plan the placement — it takes 30 seconds and saves a lot of adjusting later.
Pro tip: For the most natural result, place clusters slightly above your natural lash line rather than directly on top of it.
Think about your eye shape
Almond eyes can pull off almost any cluster style. Round eyes look great with outer-corner emphasis to elongate. Hooded eyes benefit from clusters placed slightly above the natural lash line so they're visible when your eyes are open. Monolid eyes look stunning with full-coverage placement and a slight flare at the outer edge.
Pro tip: Look straight into the mirror when checking placement — not down. That's the angle everyone else sees you at.
Finish to match your look

For a natural finish, skip mascara and let the clusters speak for themselves. A light coat of clear mascara can help blend everything together. For glam, a coat of black mascara over the clusters and your natural lashes unifies the look and adds intensity. Finish with a thin line of black eyeliner along the band to hide any gaps and make the whole look more polished.
Pro tip: Tight-lining your upper waterline with a nude or white liner makes your eyes look bigger and makes the lashes appear even fuller.
Lash Girl USA creates beginner-focused guides about DIY lash clusters, application techniques, tools, styles, retention, and product selection.