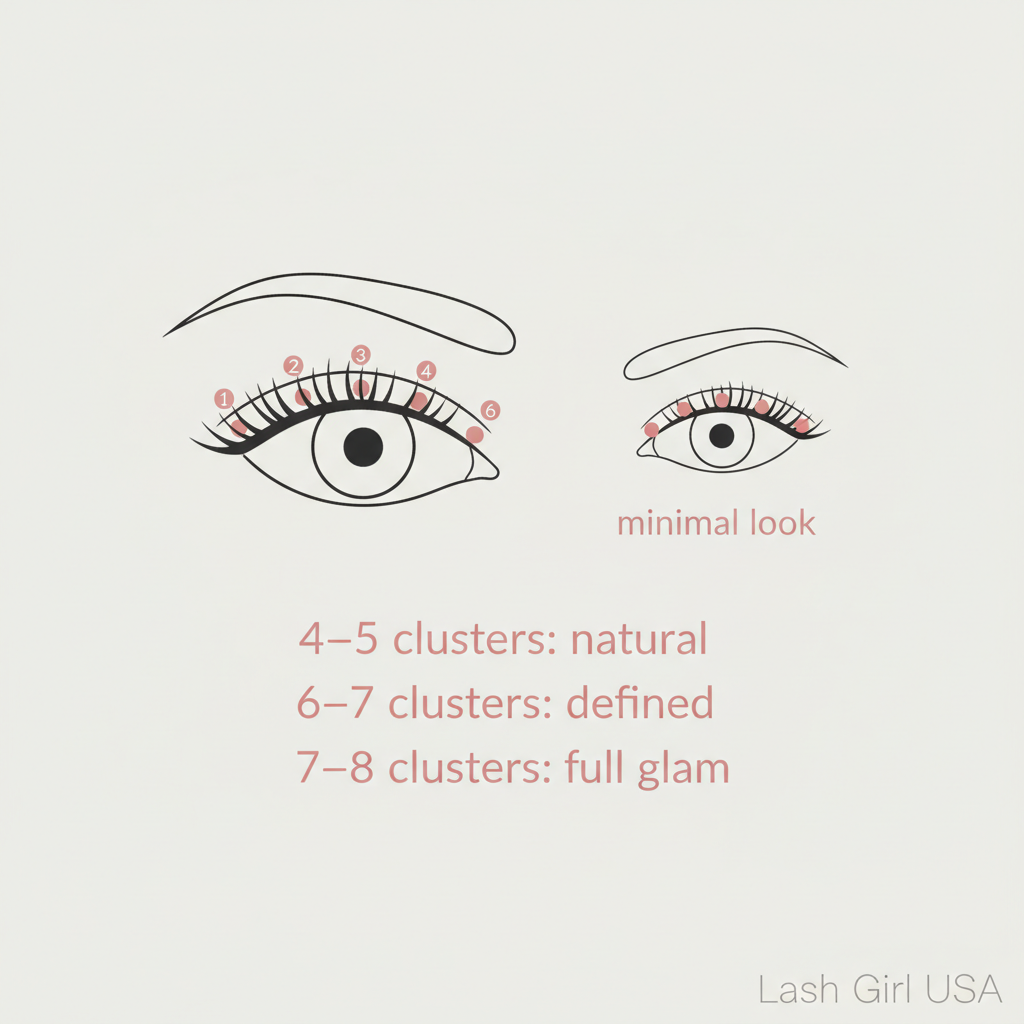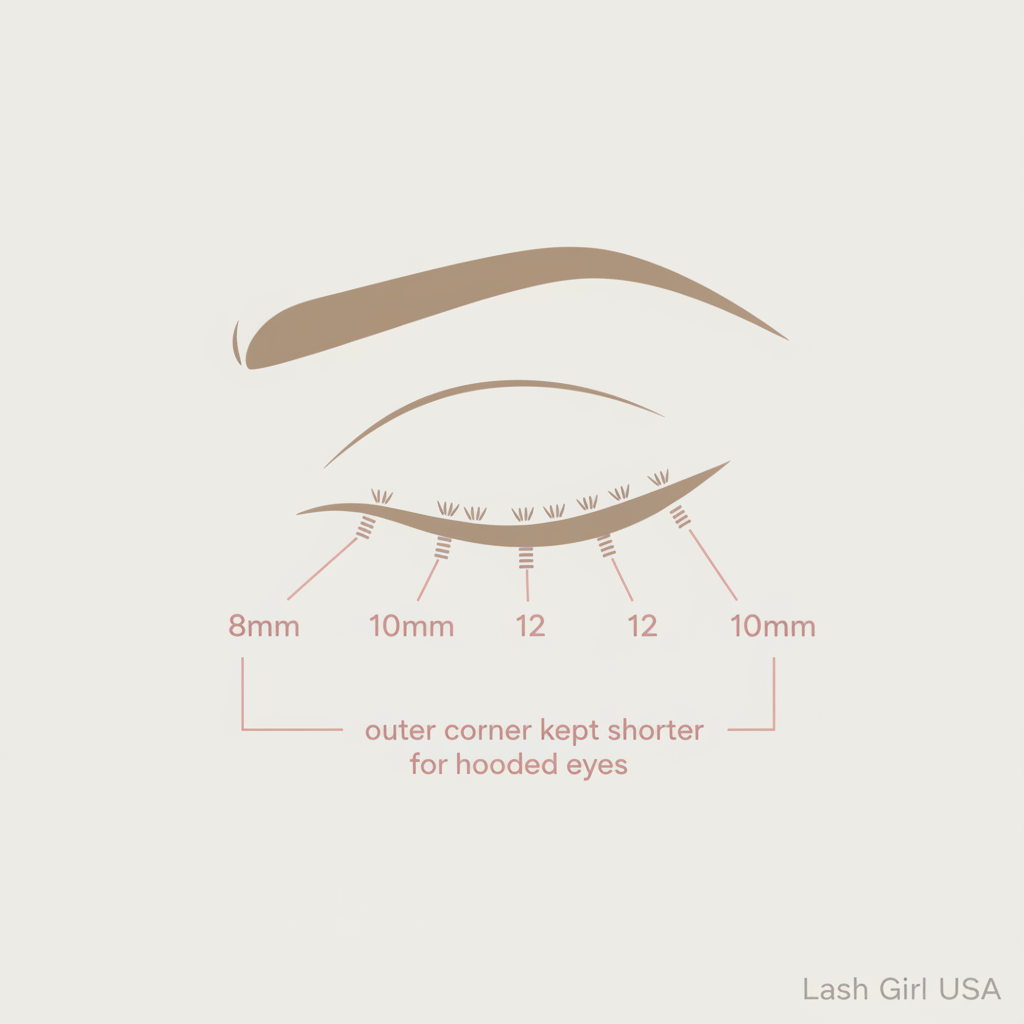
If you've ever placed clusters and ended up with a look that felt "off" — too heavy in the middle, too long at the outer corner, or just uneven — a lash map is the fix. A lash map is simply a plan for which cluster lengths go where along your lash line. It takes the guesswork out of placement and helps you build a look that's balanced for your specific eye shape. This guide walks you through a simple natural beginner map and explains how to adjust it as you get more comfortable.
What is a lash map?

A lash map is a placement guide that assigns specific cluster lengths to different zones of your lash line — inner corner, inner-middle, center, outer-middle, and outer corner. Instead of grabbing clusters at random, you follow a plan that creates a deliberate shape. Most natural maps use shorter lengths at the inner and outer corners and slightly longer lengths in the center, which mimics the natural growth pattern of most people's lashes. The result is a look that blends seamlessly rather than sitting on top of your natural lashes like a costume.
Pro tip: Sketch your map on paper before you start — even a rough diagram of five zones helps you stay organized during application.
How lash lengths affect the finished look

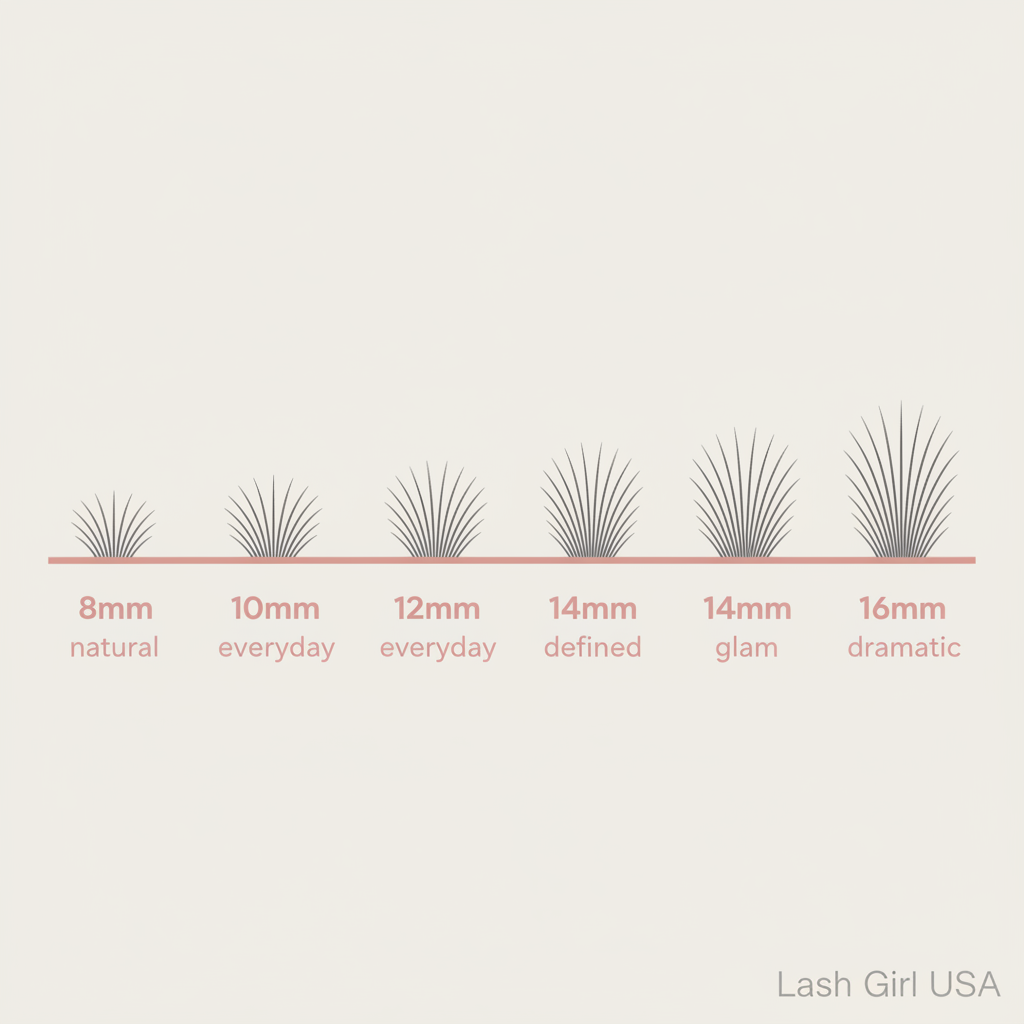
Shorter clusters (8–10mm) look soft and natural. They're ideal for the inner corner, where longer lengths can look heavy or unnatural, and for anyone who wants a barely-there enhancement. Medium lengths (10–12mm) add definition without drama — they're the workhorse of most natural maps. Longer lengths (12mm+) create lift and drama, and work best at the outer corner for a subtle cat-eye effect, or across the full lash line for a glam look. The transition between lengths matters as much as the lengths themselves — a gradual step from 8mm to 12mm looks natural; a jump from 8mm to 14mm can look jarring.
Pro tip: Hold a cluster up to your eye before applying any glue. If it looks too long before it's even on, it will definitely look too long once it's placed.
A simple natural beginner map

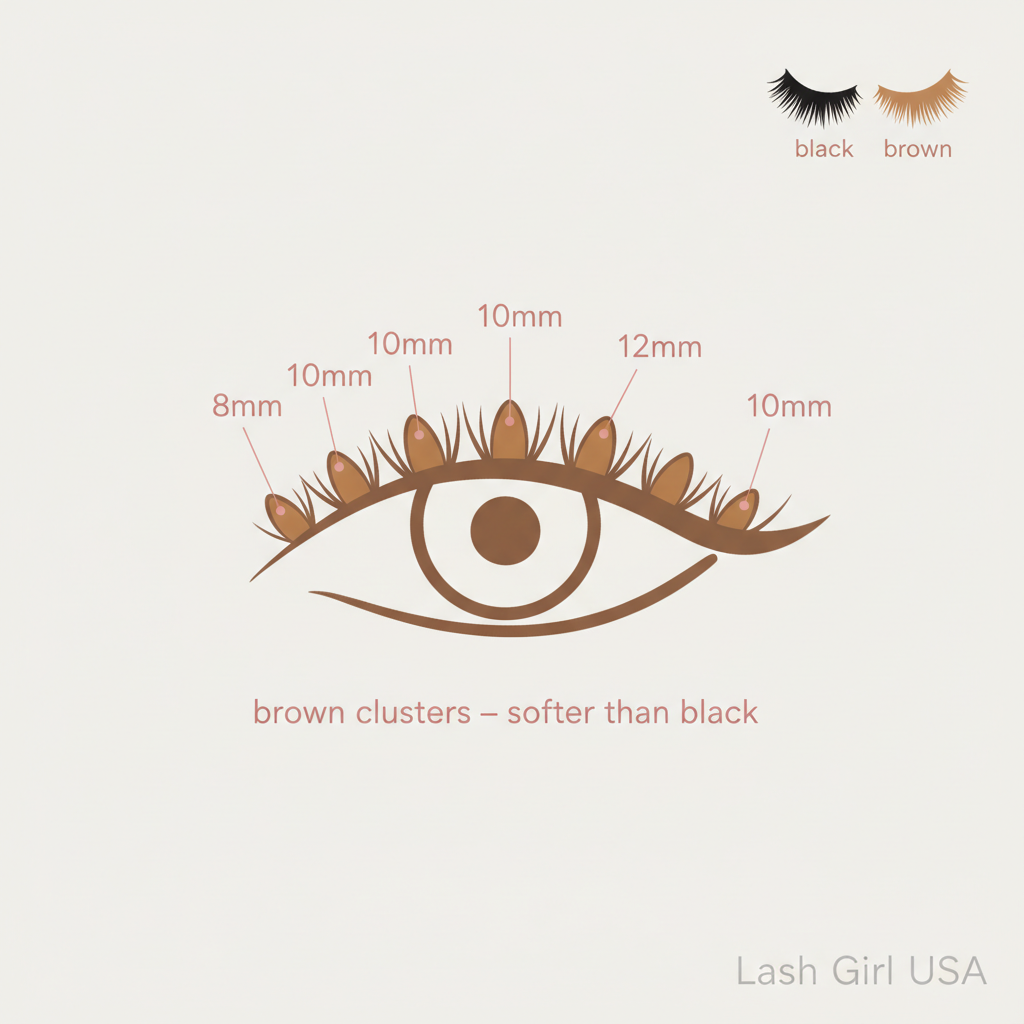
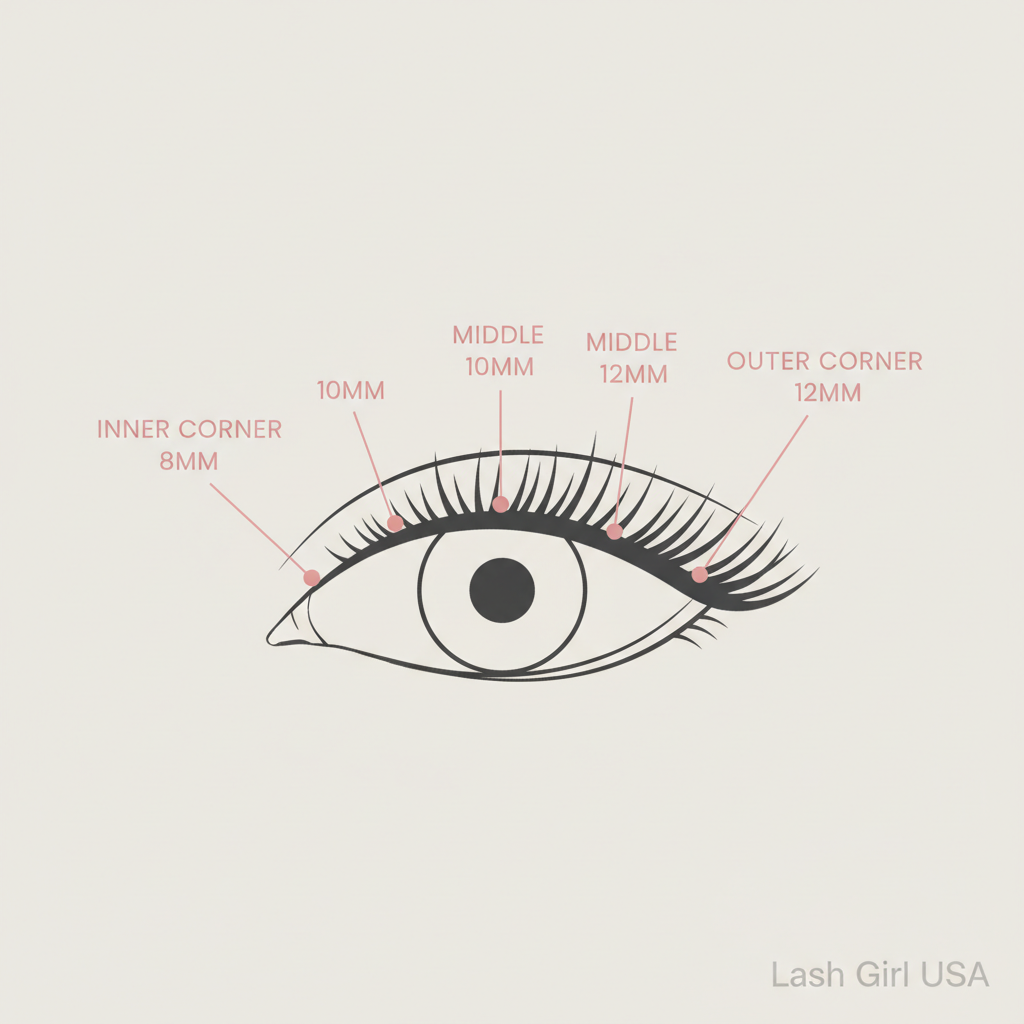
Here is a starting-point map for a natural, open-eye look. Read from inner corner to outer corner: 8mm → 10mm → 10mm → 12mm → 12mm. This means your innermost cluster is 8mm, the next two are 10mm, and the outer two are 12mm. The slight length increase toward the outer corner creates a gentle lift without a dramatic cat-eye. This is a starting point, not a rule — your eye shape, natural lash length, and the specific brand you're using will all affect how these lengths look on you. Always follow the product instructions for your chosen clusters.
Pro tip: The lash map graphic above shows this placement visually. Refer back to it during application until the pattern feels natural.
Inner, middle, and outer-eye placement guidance
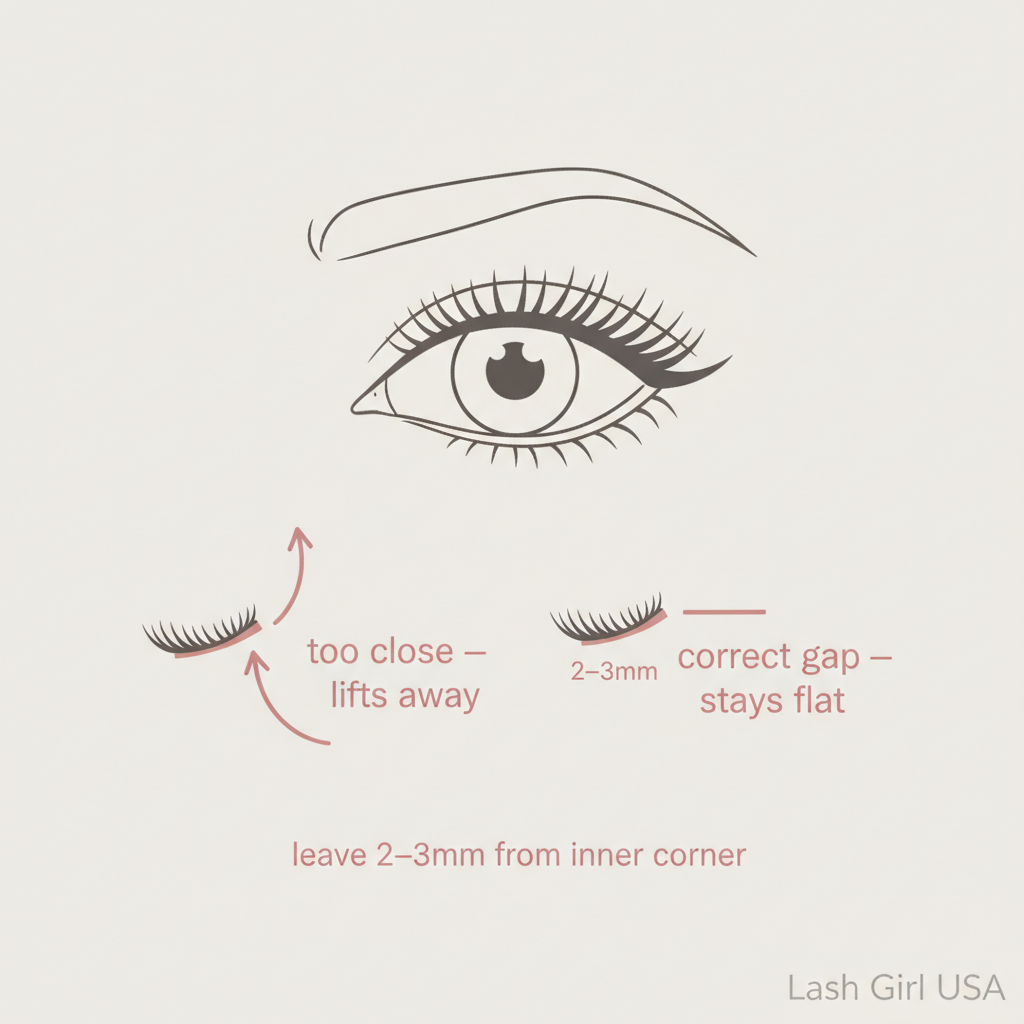
Inner corner (8mm): Start 2–3mm from the very inner corner of your eye — placing a cluster right at the inner corner can look unnatural and may cause irritation. The 8mm cluster here keeps things soft and avoids the heavy inner-corner look that beginners often struggle with. Center (10mm): The center clusters carry the most visual weight. Keeping them at 10mm gives you definition without making the eye look round or heavy. Outer corner (12mm): The slight length increase here creates a subtle lift. Place these clusters at a very slight upward angle — following the natural direction your outer lashes grow — rather than straight out.
Pro tip: If your outer corner clusters keep pointing downward, try angling your tweezers slightly upward during placement. The cluster will follow the direction you press it.
How to adapt the map for smaller or larger eyes

Smaller eyes: Use fewer clusters overall and stick to shorter lengths — 8mm and 10mm across the full lash line. Avoid 12mm+ at the outer corner, which can visually close a smaller eye. A 3-cluster map (8mm center, 10mm outer) can look more proportionate than a full 5-cluster map. Larger eyes: You have more lash line to work with, so you may need 6–7 clusters per eye. You can extend the 12mm zone across more of the outer lash line, or try 14mm at the very outer corner for a more defined look. Hooded eyes: See our dedicated guide on lash maps for hooded eyes for specific placement advice.
Pro tip: Take a photo after your first application and compare it to your reference look. Photos reveal asymmetry and proportion issues that are hard to spot in a mirror.
Common beginner mistakes
Starting too close to the inner corner: This is the most common mistake. Leave a 2–3mm gap from the very inner corner. Using the same length across the full lash line: A flat map creates a flat look. Vary your lengths even slightly for a more natural result. Skipping the map entirely: Placing clusters by feel works eventually, but a map makes your first several applications much more consistent. Choosing lengths that are too long: When in doubt, go shorter. A 10mm cluster that looks natural is better than a 14mm cluster that looks costume-y.
Pro tip: If you're unsure which lengths to buy, start with a kit that includes 8mm, 10mm, and 12mm. That range covers most natural maps without overwhelming you with options.
Frequently asked questions
Do I have to follow a lash map exactly?
No. A lash map is a starting point, not a rule. Use it as a guide for your first few applications, then adjust based on what looks and feels right for your eye shape and the specific clusters you're using.
What if the lengths in the map don't match what I have?
Work with what you have. If you only have 10mm and 12mm clusters, use 10mm for the inner two positions and 12mm for the outer three. The principle — shorter inner, slightly longer outer — applies regardless of the exact lengths.
How many clusters do I need per eye for this map?
The example map uses 5 clusters per eye (one per zone). Most people use 5–7 clusters per eye depending on eye size and desired fullness. See our guide on how many lash clusters per eye for more detail.
Can I use this map for a more dramatic look?
Yes — just increase the lengths. Swap the 10mm center clusters for 12mm and the 12mm outer clusters for 14mm. The placement zones stay the same; only the lengths change.
Lash Girl USA creates beginner-focused guides about DIY lash clusters, application techniques, tools, styles, retention, and product selection.